Tutorial – Create an AI agent in 30 seconds with Visionsoft and without any code
Temps de lecture : 4 minutes 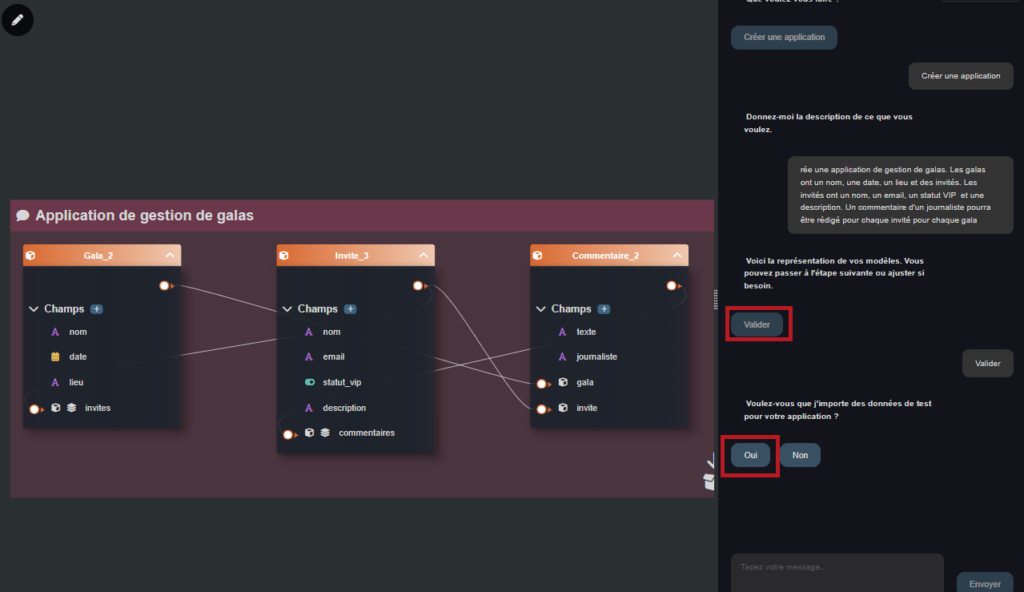

Do you want an AI agent that understands, interacts, and acts like a human? With knowledge of your data?
With Visionsoft, it’s possible in 30 seconds – and without writing a single line of code!
Note: For this tutorial, we based ourselves on the HuggingFace’s tutorial “Creating a RAG Tool for Guest Stories”, which is done with Python code. So you can see the difference between code and no-code, the time saved and the ease of use!
Especially since, by the way, in this tutorial, we generate the application for managing the data used!
Here’s how to do it:
Create an AI agent capable of responding to your users or customers, qualifying requests or automating a business process, all 100 % no-code.
On the Visionsoft Studio home page, click on “Launch SmartPilot”, then on the button “Create an application”.
Prompt to copy: “Create a gala management application. Galas have a name, date, location, and guests. Guests have a name, email, VIP status, and description. A journalist’s comment can be written for each guest for each gala.”
You can see the data model proposed by SmartPilot.
Click on “Validate”
For the test data, Visionsoft will take care of it. Copy this instruction to guide it: “Galas are awards ceremonies in France. The guests are French movie stars. For their emails, enter contact+[name]@visionsoft.tech, replacing [name] with their name (and without brackets).”
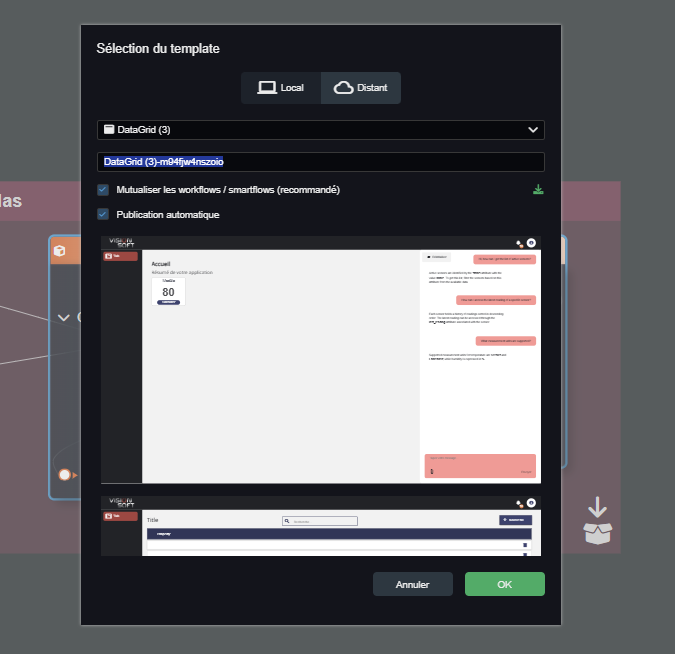
Then click on “Generate an application”
Choose the “DataGrid 3” template, it’s the one I prefer 😉 and there is a chatbot already placed on the Home page.
and click on “Validate”
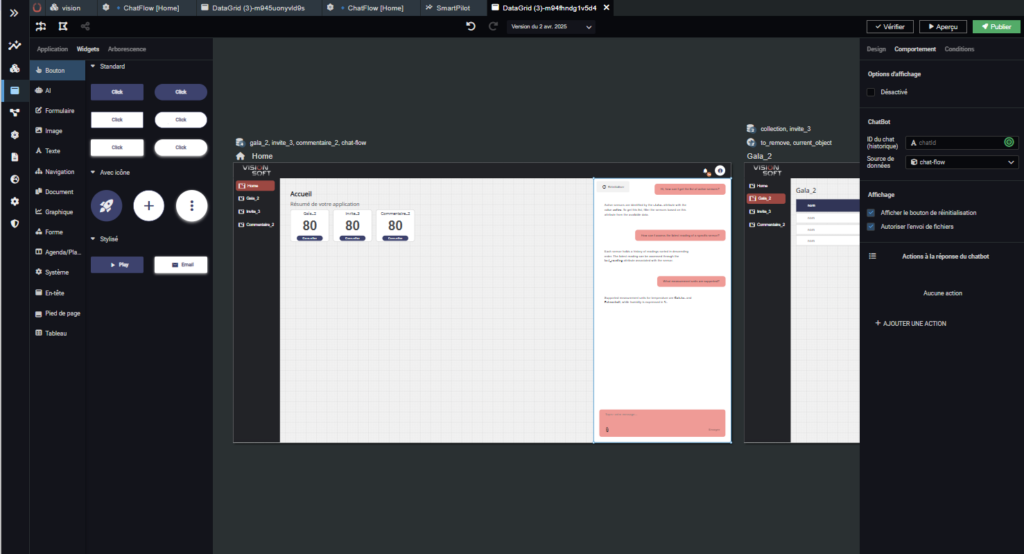
You can view the published app from the “Preview” button.
Please note, the chatbot is not yet operational, we will see that shortly.
Note that the generated application is fully editable, in no-code! No bugs to fix, no coding skills required 🙂
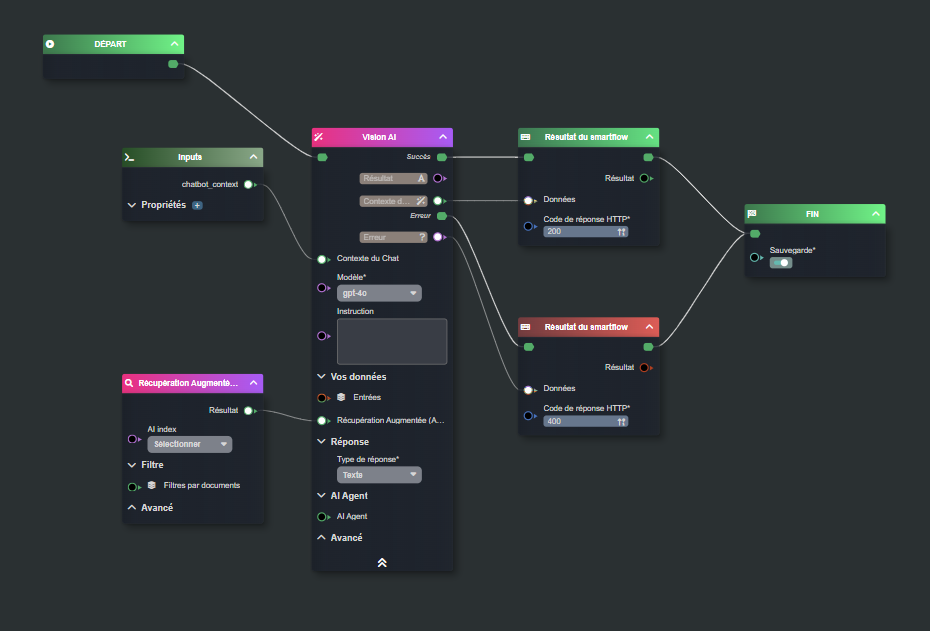
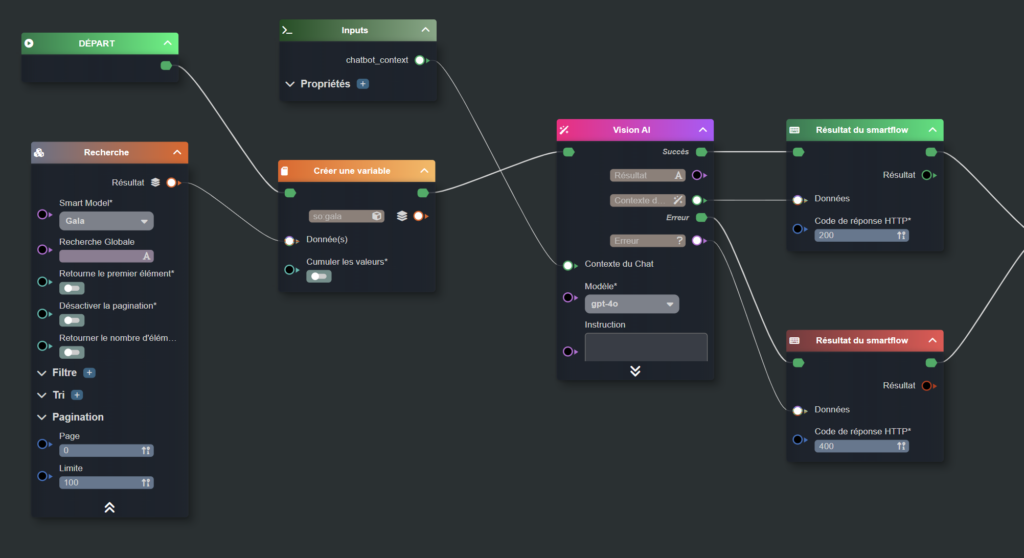
The chatbot doesn’t have a data source, so we’ll first create a standard source and then add to it. Select the chatbot, click the “Behavior” tab, and click “Create a chat flow,” then let’s edit it:
We will now personalize the chatbot by giving it a general instruction and providing it with 3 tools a specific tool to get the list of galas and guests, using the power of smartflows (blue box below)
To give the AI agent your application data,
Then don’t forget to
Optionally, to go further, you can add to your agent
For sending emails
For the list of users
To notify an app user
Then add an “AI Agent” node